Seaglider Deployment Procedure
For field teams and vessel operators
This document covers assembling a Seaglider from its shipping crates, running self-test, and launching from a small boat. It complements the Seaglider Deployment Checklist, which covers field-kit and pilot sign-off in more general terms — this page walks through one real field deployment in more physical detail.
Source
Paraphrased from a community Seaglider field deployment write-up, including photos from that deployment. Menu wording and self-test flow will vary slightly by basestation/firmware version — confirm against your own glider's menus.
Tools and Equipment
- Zip ties (preferably long ones)
- Cutter
- Duct tape
- 30 m or longer line (preferably light)
- Laptop
- Satellite phone
- The glider toolbox (shipped in the same box as the glider)
Assembly (if needed)
In case the glider arrives in two boxes: the pressure hull and forward fairing in one, the aft fairing in a smaller second box. Assembly is a two-person job.
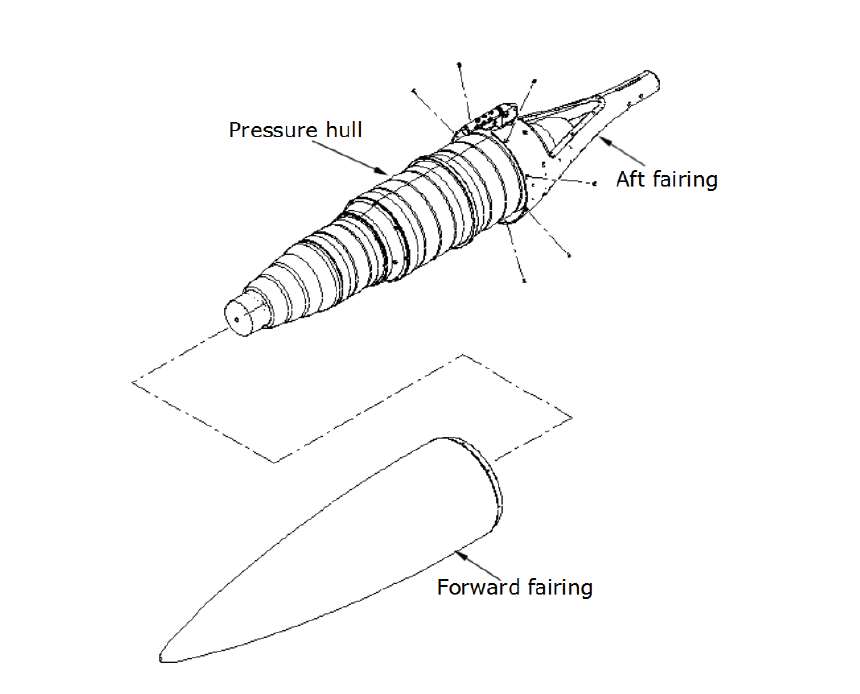
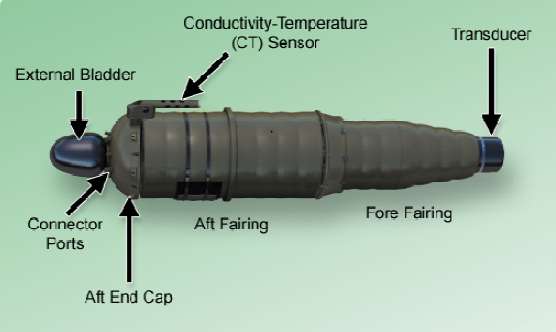
Never lift the glider by the CT sensor
It can look like a handle, but it isn't one.
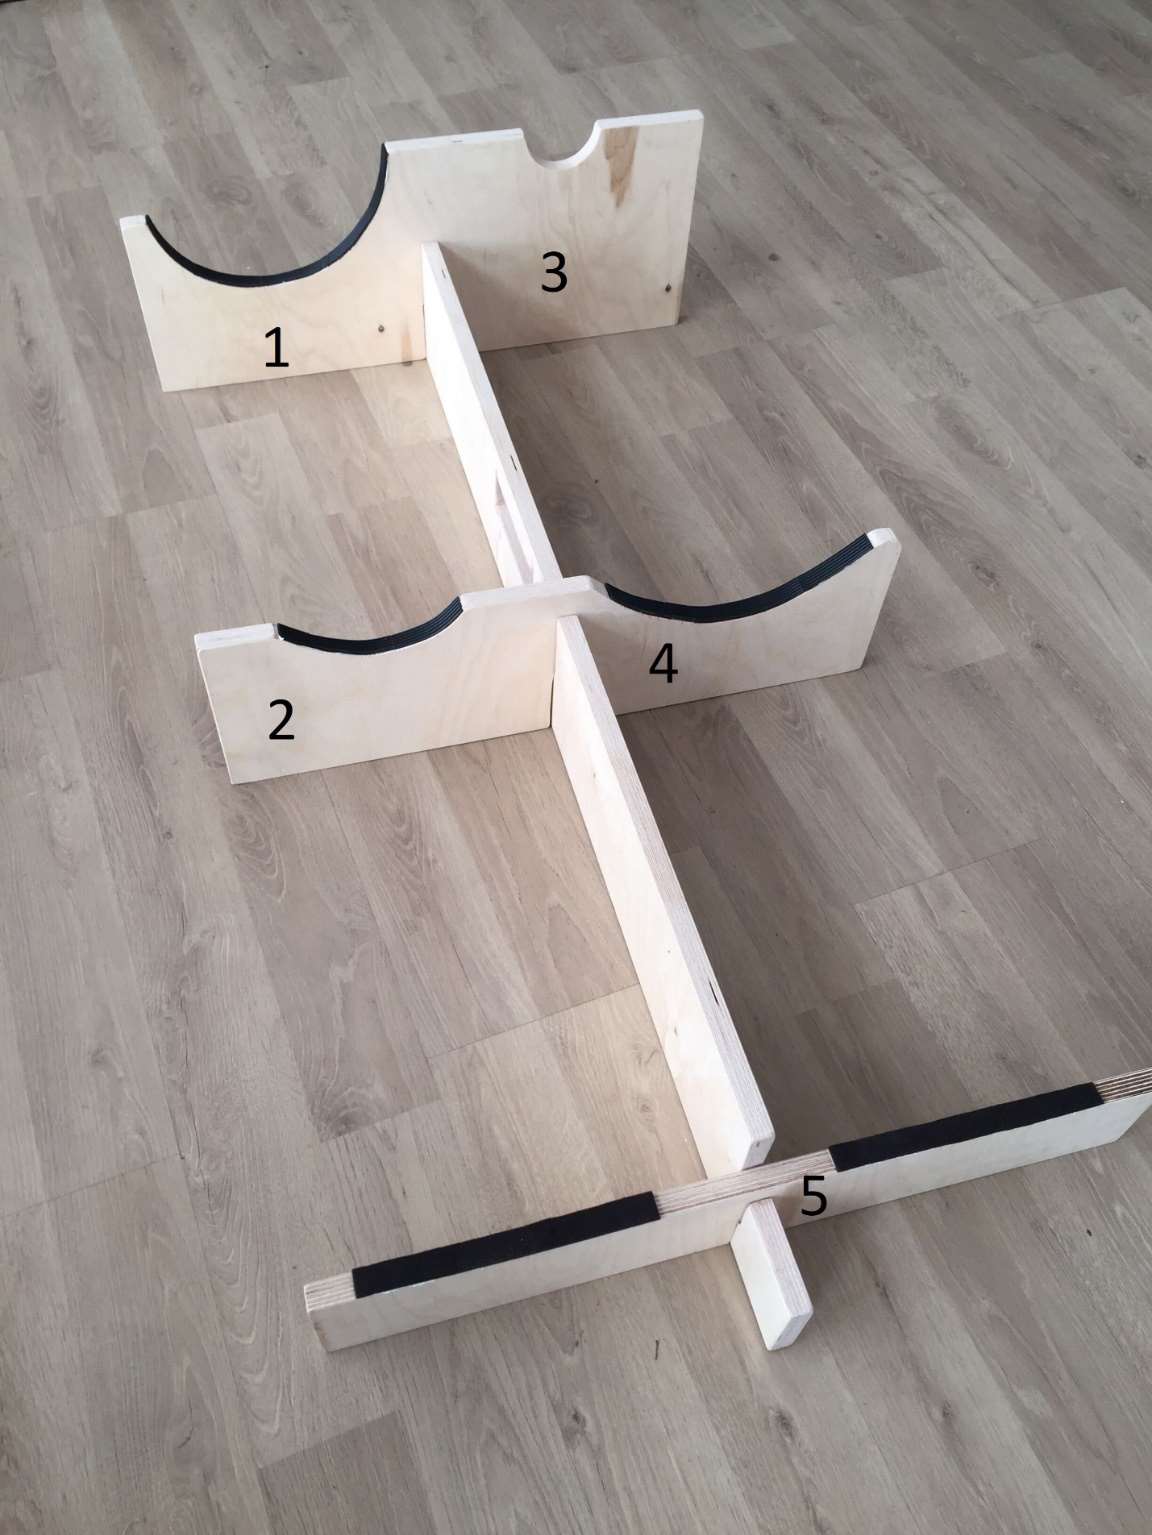
- Place the pressure hull on a wooden assembly stand, front end on position 2 and aft end on position 1.
- Align the aft fairing with the pressure hull and install it with the screws from the glider toolbox (10-32 × 3/8").
- Move the assembly to the other side of the stand so the aft fairing's front sits on position 4 and the pressure hull's front sits on position 5.
- One person pushes the glider's aft down toward position 3 to lift the nose clear of position 5, while the other slides the forward fairing on and aligns the screw holes — the fairing is marked to show which side is "top". Install the screws (10-32 × 3/8").
Sensors and Antenna Cables
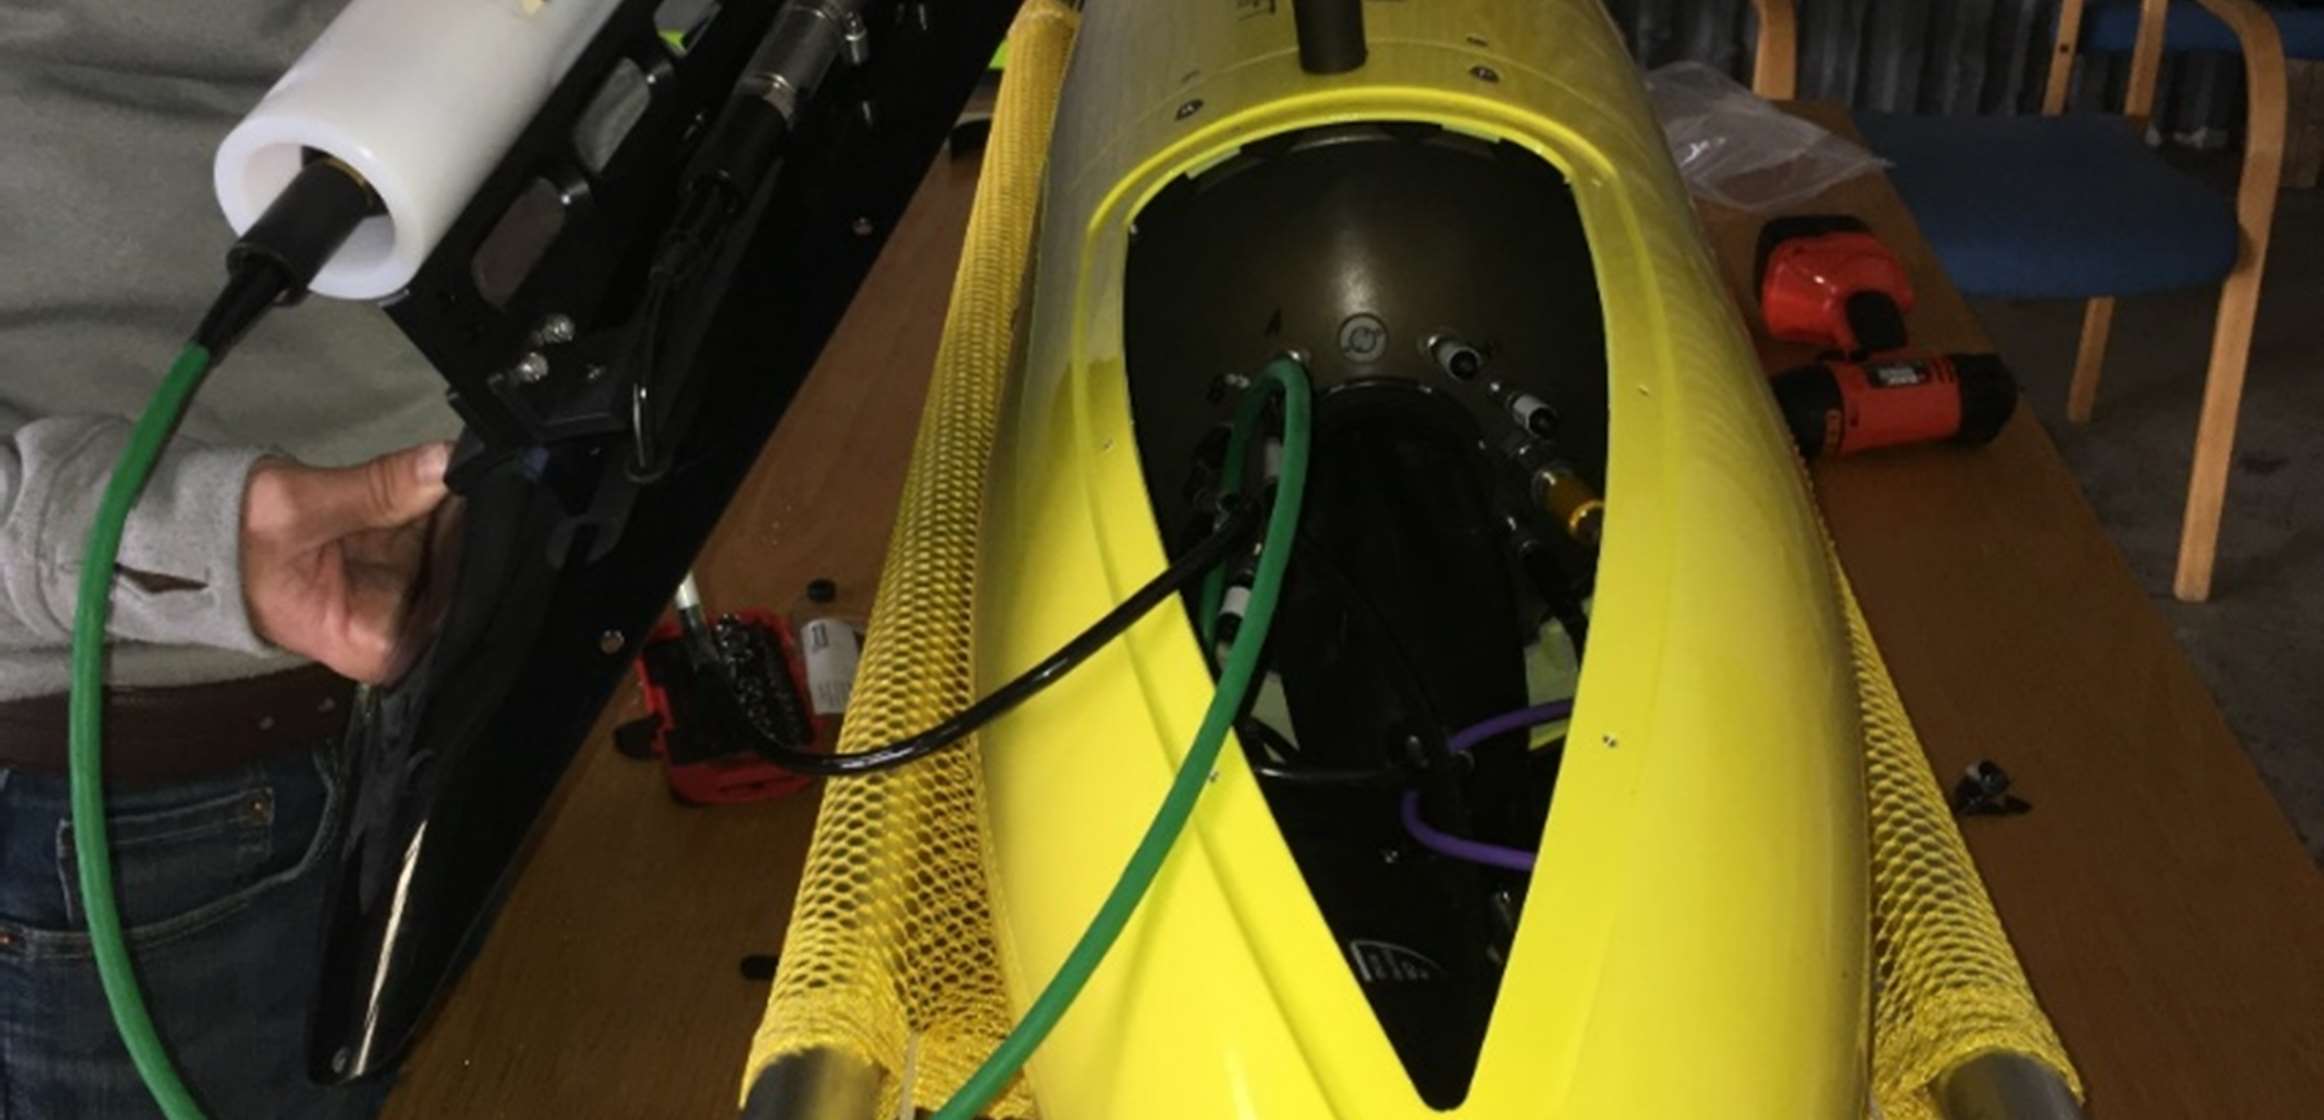
- Remove the hatch (8 screws attaching it to the aft fairing) to access the cables.
- Connect each science sensor to its labeled connector — dummy plugs with a black cap mark where a sensor belongs; align the pins carefully before hand-tightening the sleeve.
- Feed the antenna's two cables into the aft fairing, connect the communications cable to port A, and connect the antenna to its connector. Snug the antenna connector slightly with the locking pliers from the toolbox.
- Reattach the hatch.
Self-Test
- Place the glider somewhere with a clear view of the sky, antenna pointed up.
- Remove the dummy plug and connect the communications cable to the antenna's connector.
- Connect the USB cable to a laptop and open a terminal at 9600 8N1 (the default for most terminal programs).
-
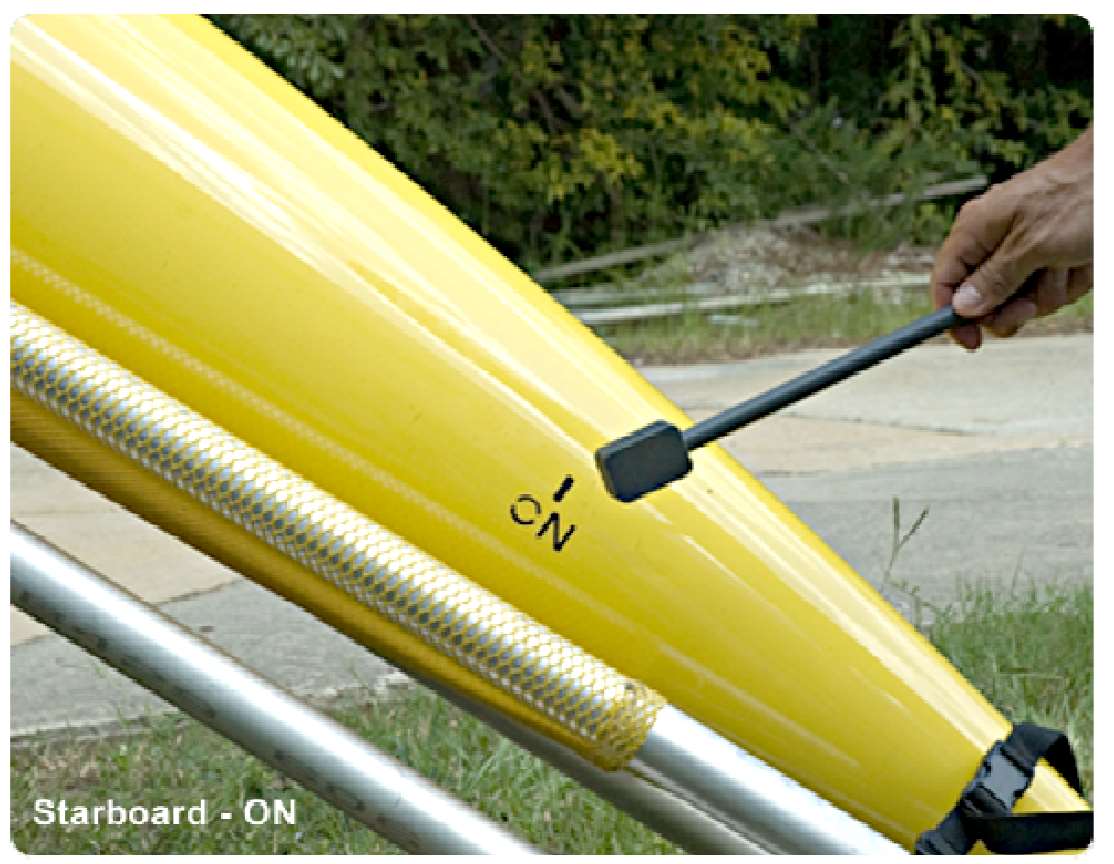
Wave the magnetic wand over the ON marking on the hull.
-
Characters should start streaming in the terminal. After a few seconds the glider prompts for Enter — otherwise it goes to recovery mode automatically.
- Press Enter, then enter the date/time in GMT as
mm/dd/yyyy hh:mm:ss. - When asked whether you're running on external (bench) power, press Enter.
- At the Main Menu, select 5 [launch] Pre-launch, then 3 [autotest] Perform autonomous self test. The glider runs the self-test autonomously and sends results to the basestation over satellite — allow about 30 minutes.
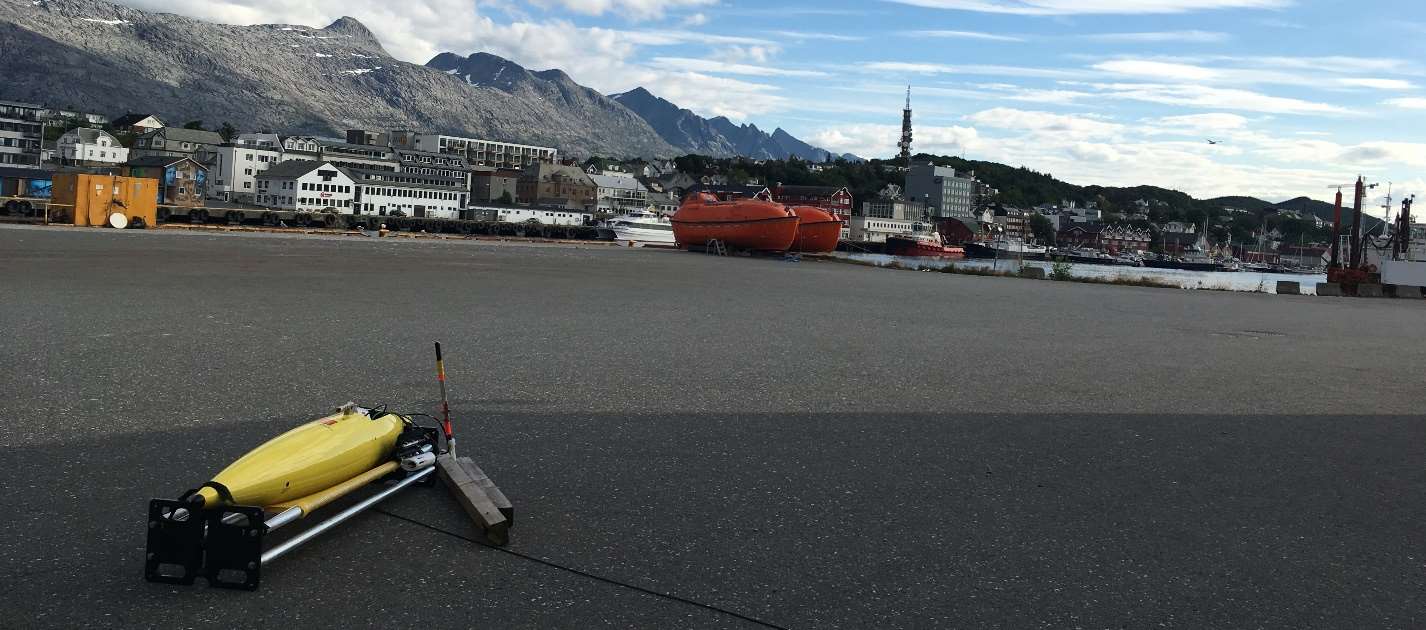
Example self-test terminal output
------ Main Menu ------
    1 [param   ] Parameters and configuration
    2 [hw      ] Hardware tests and monitoring
    3 [modes   ] Test operation modes and files
    4 [pdos    ] PicoDOS commands (and exit)
    5 [launch  ] Pre-launch
Enter selection (1-5,CR): 5

------ Launch Menu ------
    1 [scene   ] Set scenario mode
    2 [selftest] Perform interactive self test
    3 [autotest] Perform autonomous self test
    4 [uploadst] Upload self-test results
    5 [reset   ] Reset dive/run number
    6 [test    ] Test Launch!
    7 [sea     ] Sea Launch!
  CR) Return to previous
Enter selection (1-7,CR): 3
9.831,SUSR,N,Beginning selftest #63 on glider SG123
0.115,SUSR,N,Fri Aug  3 09:08:05 2012
0.207,SUSR,N,---- Audible pings to mark start of tests ----
Launch
Once self-test succeeds and the pilots give the go-ahead, start the launch procedure while the communications cable is still connected.
- If not already there, press 5 for the Launch Menu.
- Press 7 for Sea Launch!. The glider steps through the launch dialogue.
- At "Can the antenna be used for GPS and Communications? [Y]", press Enter to accept the default.
- When asked about changing
$TEL_NUM/$ALT_TEL_NUM, press Enter to leave them unchanged. - The glider calls the basestation, then asks "Has pilot given permission to launch?" — contact the pilots and wait for their OK before typing Y.
- Wait for the
$QUITprompt before disconnecting the cable, then reinstall the dummy plug.
Install Antenna, Rudder, and Wings
- Insert the antenna into the aft fairing — you may need to reopen the hatch to guide the cables through — and rotate it so its screws line up with the fairing.
-
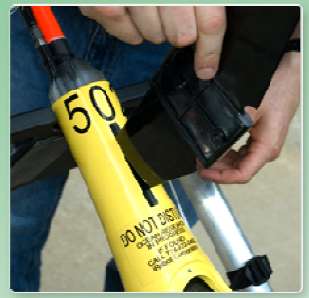
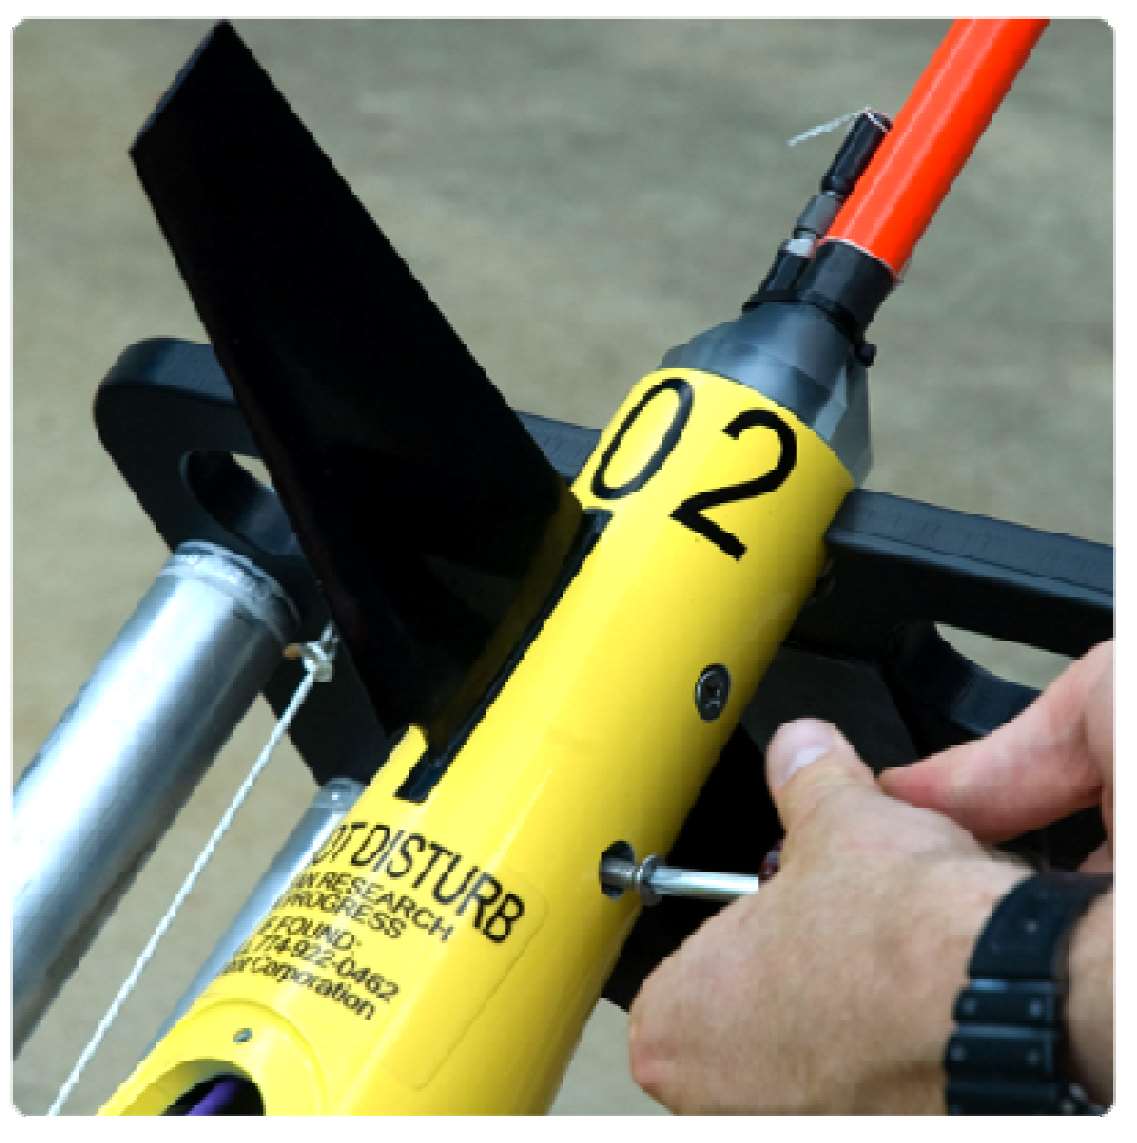
Slide the rudder through and install its two screws.
-
Install each wing (marked Starboard or Port) with four 10-32 × 1/2" screws.
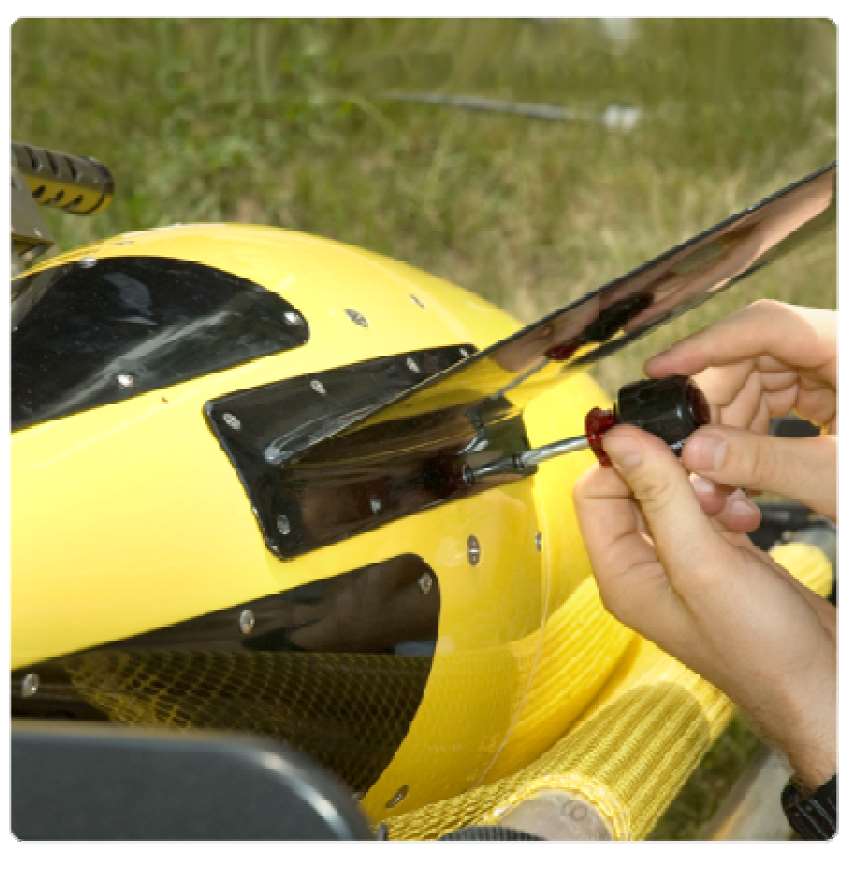
Deploy the Glider in Water
- Have a line ready — 30 m or longer, preferably light.
- Remove all sensor caps if not already done.
- Confirm the pilots are ready before launch.
- With the antenna, rudder, and wings attached and the glider already in Sea Launch mode, tie a line around the rudder and lower it slowly into the water — pull on the wings and rudder to lift the glider in and out of the water, not on anything else.
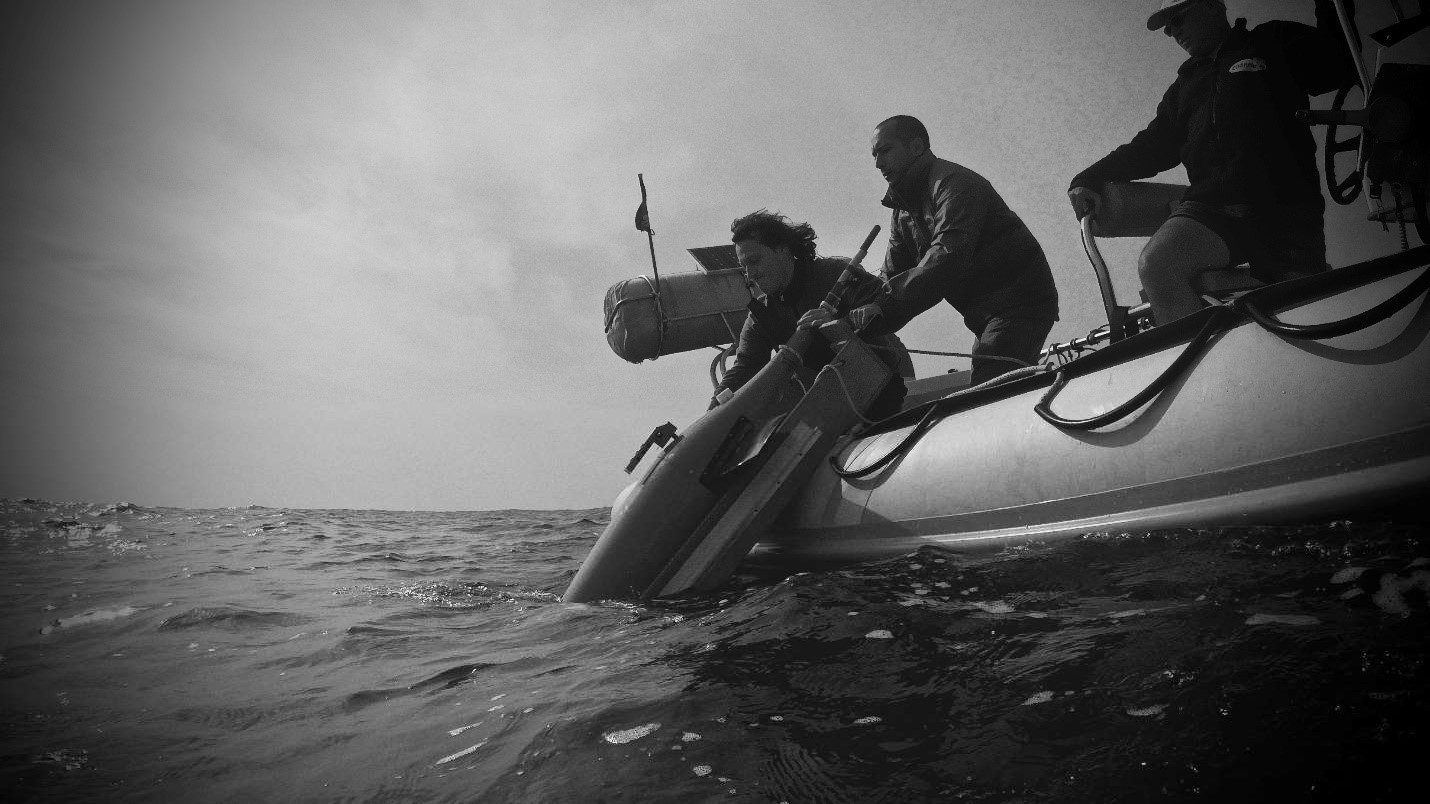
- Once in the water, grab the antenna mast (the orange section below the antenna element) and push the glider under briefly to clear trapped air bubbles.
- The glider should surface and sit at a 60°+ angle. Report its position to the pilots.
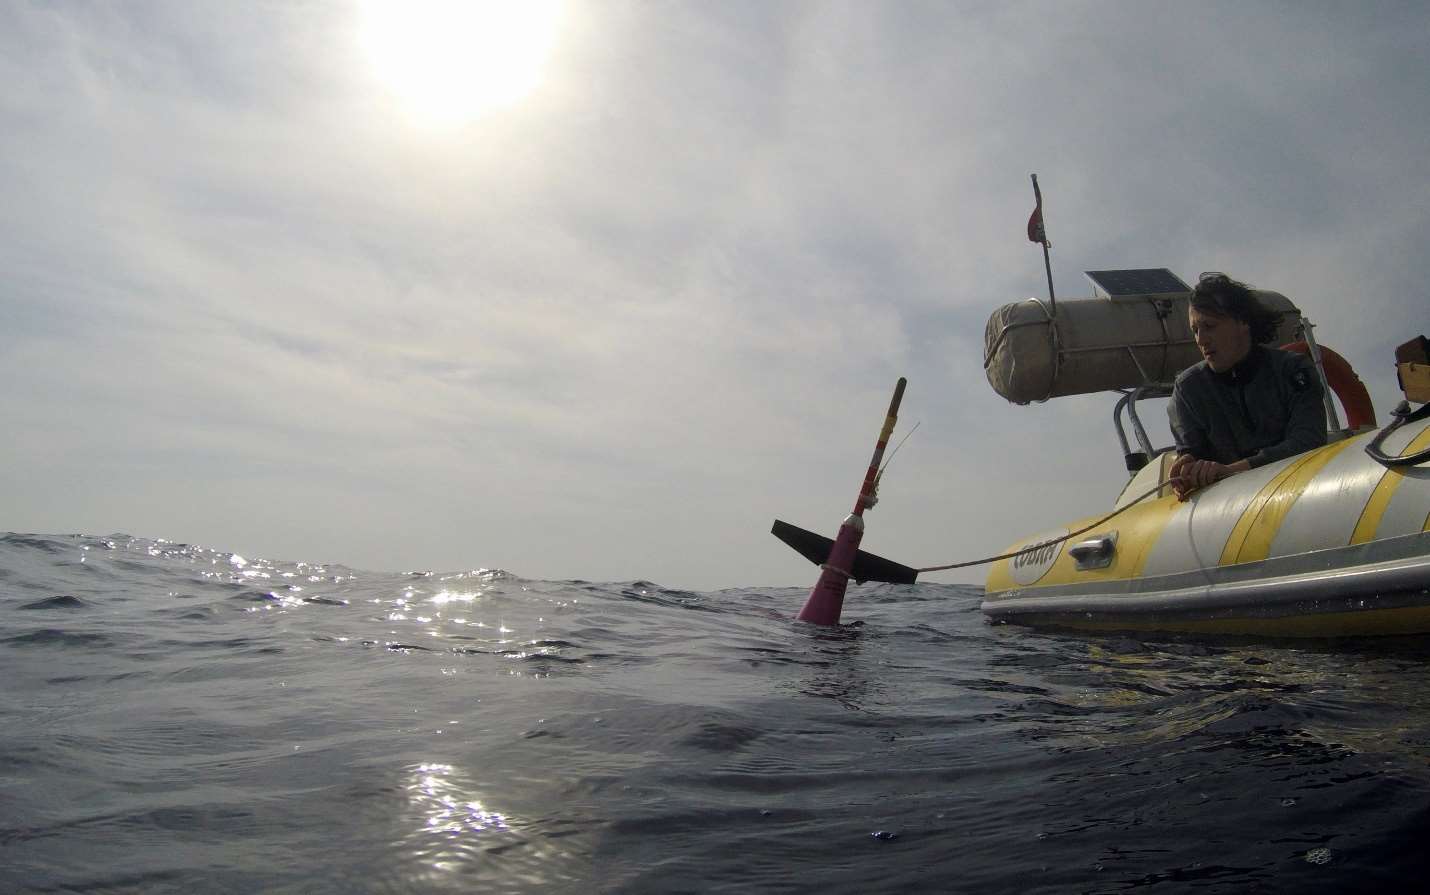
- If the pilots are happy, they'll send the glider for a short tethered dive — keep enough slack in the line that it never pulls the glider out of the water.
- Once that's done and the pilots give the go-ahead, remove the line; the glider will run a few more short dives untethered.
- Once the pilots are confident the glider is flying correctly, the field team's job is done and the deployment is successful. If the glider runs into trouble at any point, the pilots may ask the field team to recover it instead — see Recovery Procedure.